Index
How to host a free Minecraft server
If you are wondering how to host a free Minecraft server, you should know that the procedure varies depending on the platform from which you usually play the Mojang title. In fact, the latter is available in two versions: the Java Edition, available only on PC, and the Bedrock Edition, instead, available for Windows 10, mobile devices and consoles. Below you can find all the details of the case.
Come hostare un server Minecraft gratis Java
The version of Minecraft most used by fans as regards the servers is certainly that Java by PC, given that the possibility of creating virtual rooms for the latter has existed for quite some time.
In any case, I am going to explain to you how to make a free minecraft server without hamachi. I think it is important to make this premise, as Hamachi is a program that was used a lot in the past (some users still use it today) and allowed you to set up a VPN and create virtual rooms. However, this method is no longer, in my view, the best solution to achieve your goal.
In addition, even Minecraft fans themselves often say that Hamachi is no longer the ideal solution, as there are more immediate and easy-to-use solutions. It should also be emphasized that they exist various types of servers and that the Minecraft developers themselves make the tools available to create them.
In this regard, the procedure that you can find below will therefore guide you to creation of a Vanilla server, which is not modified from the original game.
To get started, I recommend that you first check that you have all the requirements required for the correct creation of the virtual room. To perform this operation, the advice is in fact to use a gaming computer it's a performing Internet connection, possibly wired. There are actually no specific official requirements, but using, for example, a notebook and a low-speed Wi-Fi network may not be the best idea.
Also, you have to be able to use Java directly from the command line, as well as carry out theopening the right network port which will then allow other people to connect to your server. Before explaining how to configure everything, I just want to let you know that by performing this procedure you could potentially "open the doors" to any problems in terms of safety.
For this reason, I recommend that you only proceed if you know the world of PCs and networks, so carry out everything in a conscious way and without too many risks. In these cases you never know: it is always good to get information and do everything knowing what you are doing.
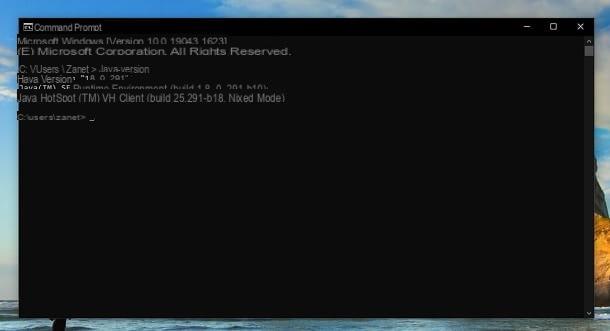
That said, if you are going to proceed to the Java configuration on Windows, I recommend you open the Command Prompt (you can do it via the search bar at the bottom left) and use the java -version command, giving Submit to confirm. By doing so, the version of Java currently installed on your PC: if the latter is among the latest available, you do not have to do anything else.
If, on the other hand, you want to be sure that everything is updated to the latest version, just connect to the official Java website and press the button Accept and start free download. After that, open the file jre- [version] -windows- [version] .exe obtained and click the buttons successively Yes, Install e Close. By doing so, you have updated Java to the latest version.
I remind you that, in order for everything to be set up correctly, you may also have to act on the environment variabile PATH (if you haven't already). In this case, I recommend that you check out my tutorials on how to configure Java and how to install Java.
Per quel che concerning, invece, MacOS, it is necessary to go to the Launchpad, select the folder Other and open the terminal. After that, you can use the classic java command -version and press Submit to verify the version of Java you have available. If you want advice, one trick you may want to take is to update everything to the latest version. You can do this simply by connecting to the official Java portal and following the classic procedure.
Please note: some specific versions of Java may cause some "headaches" when creating the server. For this reason, I want to let you know right now that, in case you encounter a JNI error during the procedure, a possible solution is to install the version 16.0.1 of Java, which you can find from the official website.
Once you've configured Java correctly, it's time to open the right port of the router, so that there are no problems in terms of connection. Put simply, you need to do some port forwarding. In this case, each router has its own story: it is therefore difficult for me to provide you with precise information relating to your model.
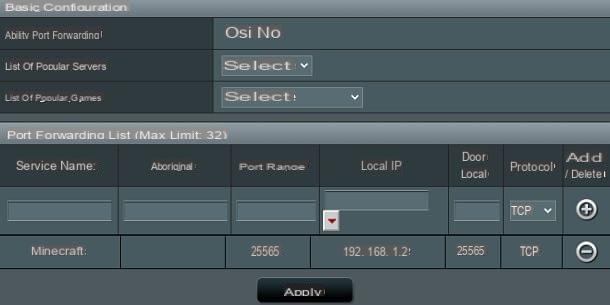
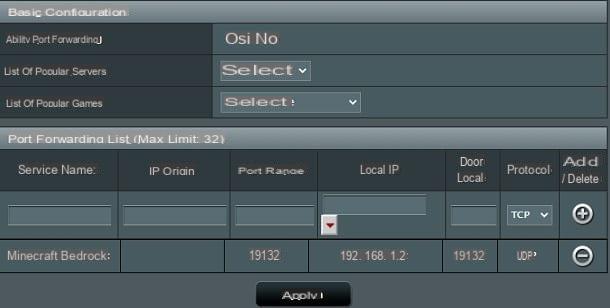
However, in reality the procedure is generally not that complex. To give you a concrete example, usually using a ASUS router just connect to the appropriate configuration portal (e.g. by typing in the browser 192.168.1.1 or `192.168.0.1 by entering username e Password: for more details, you can refer to my guide on how to enter the router and the one on how to see the modem password), click on the entry for the WAN and press on the option Virtual Server/Port forwarding.
After that, the portal will ask Service Name (you can enter Minecraft), Source IP (you can leave blank), Port range (insert 25565, the port used by the game), IP Locale (enter the IP address of the computer you are working on), Local port (digita 25565) is Protocol (put TCP). Perfect: now press the button first + e poi quello Apply, in order to save the changes.
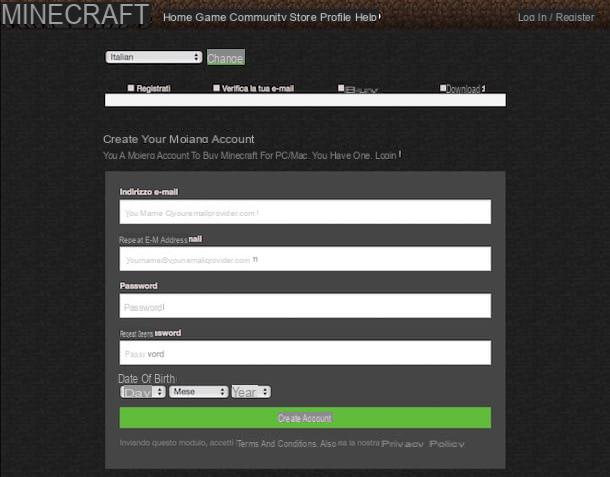
Great, now your PC and your router are configured to "bring" the Minecraft server. To proceed with the creation of the latter, therefore connect to the appropriate official website and click on the link minecraft-server. [version] .jar. In this way, you will get the file server.jar (you may need to click the button Preserve to complete the download).

At this point, I recommend that you create a folder on your desktop, called Server & Hosting, As well as of to shift within the latter the file JAR that you just downloaded. The operation you are about to perform will in fact create several files and therefore it is good to keep them inside one folder.
Successively, apri il Command Prompt (Windows) or the terminal (macOS), type the command cd Desktop / Server and press Submit. Now the terminal has access to the location where the file that the server can generate is present. You just have to type the command java -jar server.jar and give Submit.
A file is now available eula.txt inside the folder you created earlier. For accept the EULA, which is necessary to use the tool that creates the server, you just need to open this file with any text editor and change the word false to true, obviously saving changes. I remind you that you can read this End User License Agreement on the official website.
Perfect, now you just have to go back to Command Prompt / Terminal and give back the command you used before, then java -jar server.jar (always confirming with a Submit). The program may ask you to press the button Allow access. Once this is done, the server will start.
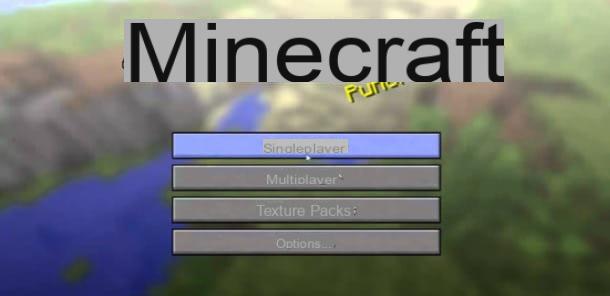
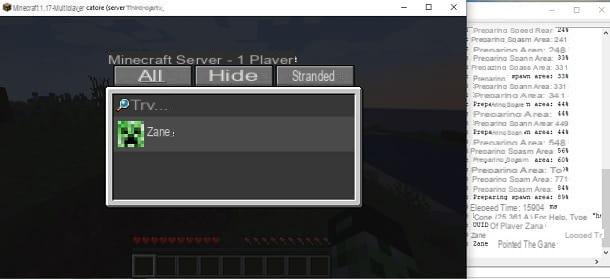
The window that appears on the screen confirms that the virtual room is in operation: you can also take a look at all the statistics and indicazioni of the case. If you want to do the "litmus test", just open it Minecraft, move to the section Multiplayer, press the key Direct access, to insert localhost and click on the button Enter the server. If everything works fine, you can play.
A virtual room of this type, however, is mainly made for play with other users. Well, the latter can connect just like you just did. In fact, you have opened the right door on your router. However, in order for your friends to connect, you must provide them with yours public IP address (which they will have to insert in the space where you entered localhost).
Finding this data is a breeze: just connect to the WhatIsMyIPAddress portal to find it (or alternatively follow my tutorial on how to find the IP address). Great, now you know a little bit of everything there is to know about this possibility. In any case, if you want deepen the topic, you can refer to the Minecraft Wiki in English, where there are also solutions related to specific problems (there are many variables in the game).
For completeness of information, you must know that there are also gods hosting portals which can simplify your work when it comes to maintaining the server online. However, in this case you pay: I only mentioned this possibility now because, if you are following this tutorial, you probably don't intend to spend anything on your server, but I wanted to let you know that there is also this possibility.
How to host a free Bedrock Minecraft server
If you usually play Minecraft via the Bedrock version available for Windows 10, mobile devices and consoles, you must know that the possibility of creating a free server in an official way is still in alpha version.
This means that you may experience problems, for example, in terms of performance, since we refer to a feature that is still in the preliminary phase. Despite this, it costs nothing to try and, indeed, everything is simpler than the Java version of Minecraft. Keep in mind, however, that the procedure I am about to illustrate is only valid for Windows.
Also, it is necessary to have a computer with a 64-bit operating systemas well as a AMD or Intel processor almeno Dual-core. The version of Windows 10 it must also be equal to or greater than 1703, as well as the PC must have at least 1GB of RAM.
In any case, before starting with the directions, I suggest you proceed with theopening a specific port on the router. In fact, this operation of port forwarding it is necessary for other people to connect to your virtual room. I therefore advise you to follow the instructions in the previous chapter, in this case by opening the port 19132 UDP.
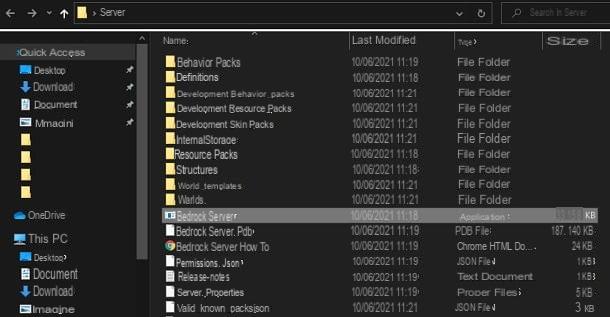
Once this is done, connected to the official Minecraft portal, check the box I agree and fai clic sul tasto DOWNLOAD, which is located inside the box related to Windows. In this way, the file will be downloaded bedrock-server- [versione] .zip. Then extract the latter into any folder. After that, start the file bedrock_server.exe (You may need to click the button first Further information e poi quello Run anyway).
In case there is interference from anyone antivirus, you may have to press, for example, on the key Allow. The file was downloaded from the official website of the minecraft developers, so the latter guarantee security, but some antivirus programs may try to carry out further checks.
At this point, if everything has been done correctly, a terminal, who will present the inscription Server started. Perfect, now your virtual room is active: seen? It wasn't that difficult to achieve your goal.
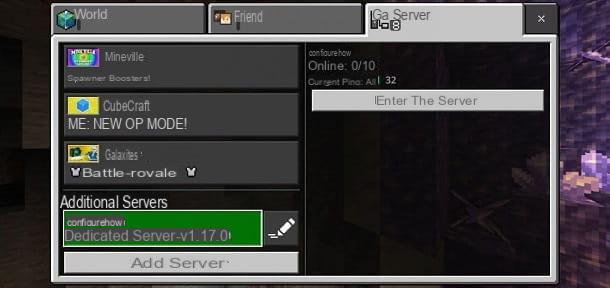
In any case, to verify that you can access the server, I recommend that you find yours public IP address (you can do it, for example, through this portal) and try to connect. To do this, just open Minecraft, press the key Play, move to the tab Server & Hosting e premere sul pulsating Add server.
At this point, type the room name (choose what you want) and yours public IP address. Do not change the port number already present (i.e. 19132). Perfect, you just have to tap on the button Play: if everything has been done correctly, you will enter the server and be able to play. Other users can connect to your virtual room in exactly this way.
For the rest, if you have any doubts about the server, I suggest you open the file bedrock_server_how_to.html, which you can find inside the ZIP file you downloaded. In fact, within this HTML page you will find a bit of everything you need to know (in English).
You are now aware of the procedures for host a Minecraft server for free. In any case, since you are a fan of the Mojang title, if you are interested in other tutorials related to the latter, you can find several guides that could do for you on the page of my site dedicated to Minecraft.
How to host a free Minecraft server